How to perform laser leveling
 Laser leveling results in a precisely leveled field −− resulting in more evenly maturing crops, higher yields and reducing water and agro-chemical use.
 Plow the field from the center of the field outwards
Plow the field when the soil is moist. Dry soil requires a significant increase in tractor power.
Disc or moldboard plow may be needed in hard soil conditions. Disc harrows or tine implements are ideal for secondary workings. All surface residues need to be cut up or removed to aid soil flow from the bucket.
 Take a topographic survey of high and low areas
Take a topographic survey of the field, then draw a diagram noting high and low areas.
Using the surveyed readings, establish the mean height of the field.
Based on the field diagram and mean height, determine the strategy to effectively move soil.
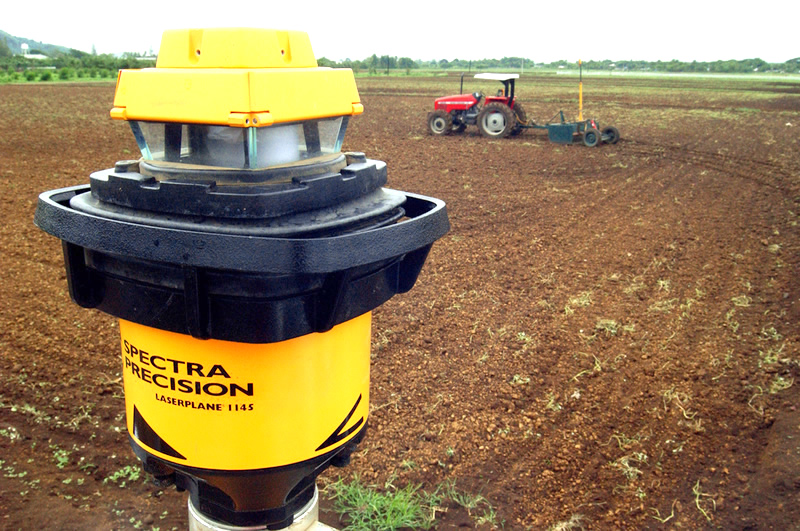
 Check and calibrate the laser transmitter
Periodically check the laser transmitter for accuracy. All checking and calibration procedures are done at the zero slope reading.
To check accuracy
Things needed:
- A suitable tripod that allows you to rotate the transmitter in 90 degree increments
- A minimum 65 meter range that is unobstructed and as close to flat as possible
Mount the unit on a tripod at one end of the 60 m range and level it. Set X and Y-axis grade counters at zero. With auto leveling transmitters, turn the transmitter control switch to the AUTO position and wait for the Auto Mode Indicator Lamp to stop flashing.
- Station a rodman with a receiver at the other end of the range 60 m away.
- Align the laser, using the sighting scope or groove, such that the “X” is pointed directly at the rodman. Make sure the pentamirror is rotating and the Auto Mode Indicator Lamp has stopped flashing (if appropriate).
- Have the rodman take a precise reading to within 2 mm and mark the reading as X1.
- Rotate the transmitter 180 degrees and wait at least 2 minutes for it to re-level. In non-auto leveling transmitters, manually re-level the transmitter Have the rodman take another accurate reading and mark it down as X2.
If the difference between X1 and X2 is less than 6 mm, no adjustment is necessary and the laser can be assumed to give the correct reading.
If the difference is between 6 mm and 38 mm the transmitter then needs to be calibrated and this can be done locally in the field. See calibration of the transmitter.
If the difference is 38 mm or greater the unit must be re-calibrated at an authorized service center. You can not recalibrate it in the field without damage to the unit
 Level the field
 The laser-controlled bucket should be positioned at a point that represents the mean height of the field.
For a rotovator, set the cutting blade slightly above ground level (1–2 cm). Drive the tractor in a circular direction from the high areas to the lower areas in the field. When the whole field has been covered in this circular manner, do a final leveling pass in long runs from the high end of the field to the lower end.
In wet areas where there is poor traction or a chance of bogging the tractor, carefully fill the wet areas from the effected edge in a circular motion. Depending on the amount of soil that must be moved, it is possible to level one to two hectares per day using a 50 kW tractor and a two meter wide bucket.
If done properly, laser leveling should not be needed for another 4 years. A light tillage should follow leveling to loosen the soil for planting.